POSTS
Lightning Web Component Community Case Creation
In this post we will create a case creation form, using the lightning-record-edit-form component alongside proper redirection to the record page once the button has been submitted.
Getting Started
You will need to get yourself setup with Salesforce-DX, if you haven’t had the chance to do so, this is a good time to get your environment setup since we will use it to deploy our LWC to a scratch org for testing.
Steps To do
Start your project
sample project-scratch-def.json
{
  "orgName": "CaseCreation Demo",
  "edition": "Developer",
  "features": ["Communities", "Sites", "SiteDotCom"],
  "hasSampleData": "false",
  "settings": {
      "orgPreferenceSettings": {
          "s1DesktopEnabled": true,
          "selfSetPasswordInApi": true,
          "s1EncryptedStoragePref2": false,
          "networksEnabled": true
      }
  }
}
run
sfdx force:org:create -f project-scratch-def.json -a myCaseCreationTest
You can either create a lightning community or push the data from your scratch org if you already have one setup in a scratch org. If you are unfamiliar with the process, you can refer to Create a Community.
Create your LWC
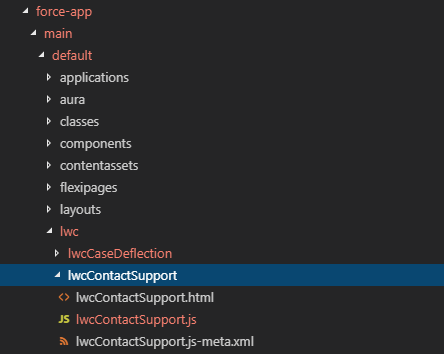
the following command will create a lightning web component in the appropriate directory:
sfdx force:lightning:component:create -n lwcContactSupport --type lwc -d force-app/main/default/lwc

contact support
Component Markup
<template>
        <div>
                <lightning-layout multiple-rows="true">
                    <lightning-layout-item padding="around-small">
										<!-- lightning record edit form -->
                        <lightning-record-edit-form object-api-name="Case" onsuccess={handleSuccess}>
                        <lightning-messages>
                        </lightning-messages>
                        <lightning-input-field field-name="Subject" name="subject">
                        </lightning-input-field>
                        <lightning-input-field field-name="Description" name="description">
                        </lightning-input-field>
                        <lightning-button
                            class="slds-m-top_small"
                            variant="brand"
                            type="submit"
                            name="save"
                            label="Create new">
                        </lightning-button>
                    </lightning-record-edit-form>
                    </lightning-layout-item>

                </lightning-layout>
         </div>
    </template>
Notice the onsuccess event handler we added to the component. We will use it to trigger the navigation once the case has successfully been created via the User Interface API.
Component Controller
The first step is to apply NavigationMixin to the component’s base class to gain access to its APIs
import { LightningElement } from 'lwc';
import { NavigationMixin } from 'lightning/navigation';

export default class LwcContactSupport extends NavigationMixin(LightningElement) {

    handleSuccess(event) {
        // View a case object record.
        this[NavigationMixin.Navigate]({
            type: 'standard__recordPage',
            attributes: {
                recordId: event.detail.id,
                actionName: 'view'
            }
        });
    }
}
The recordId is returned from the API through event.detail.id.
Navigation
In Lightning Communities, the only actionName supported at the moment is ‘view’. > PageReference objects are supported on a limited basis for Lightning Communities, as noted for each type > as indicated in PageReference Types

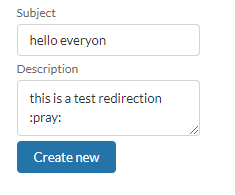
form view

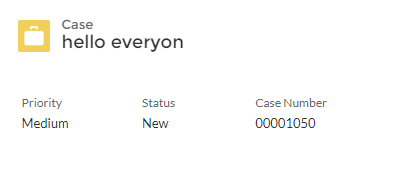
confirmed

Pros and Cons
The Pros:
- Easy to setup.
- Less code required.
The Cons:
- Not Customizable due to the nature of Shadow DOM.
- Addresses only Out of the box uses cases and setups.